Configure VisionAlert
You can configure various aspects of VisionAlert, including adding/removing cameras and assigning tags for better organization and webhook alerts.
Add/Remove Cameras
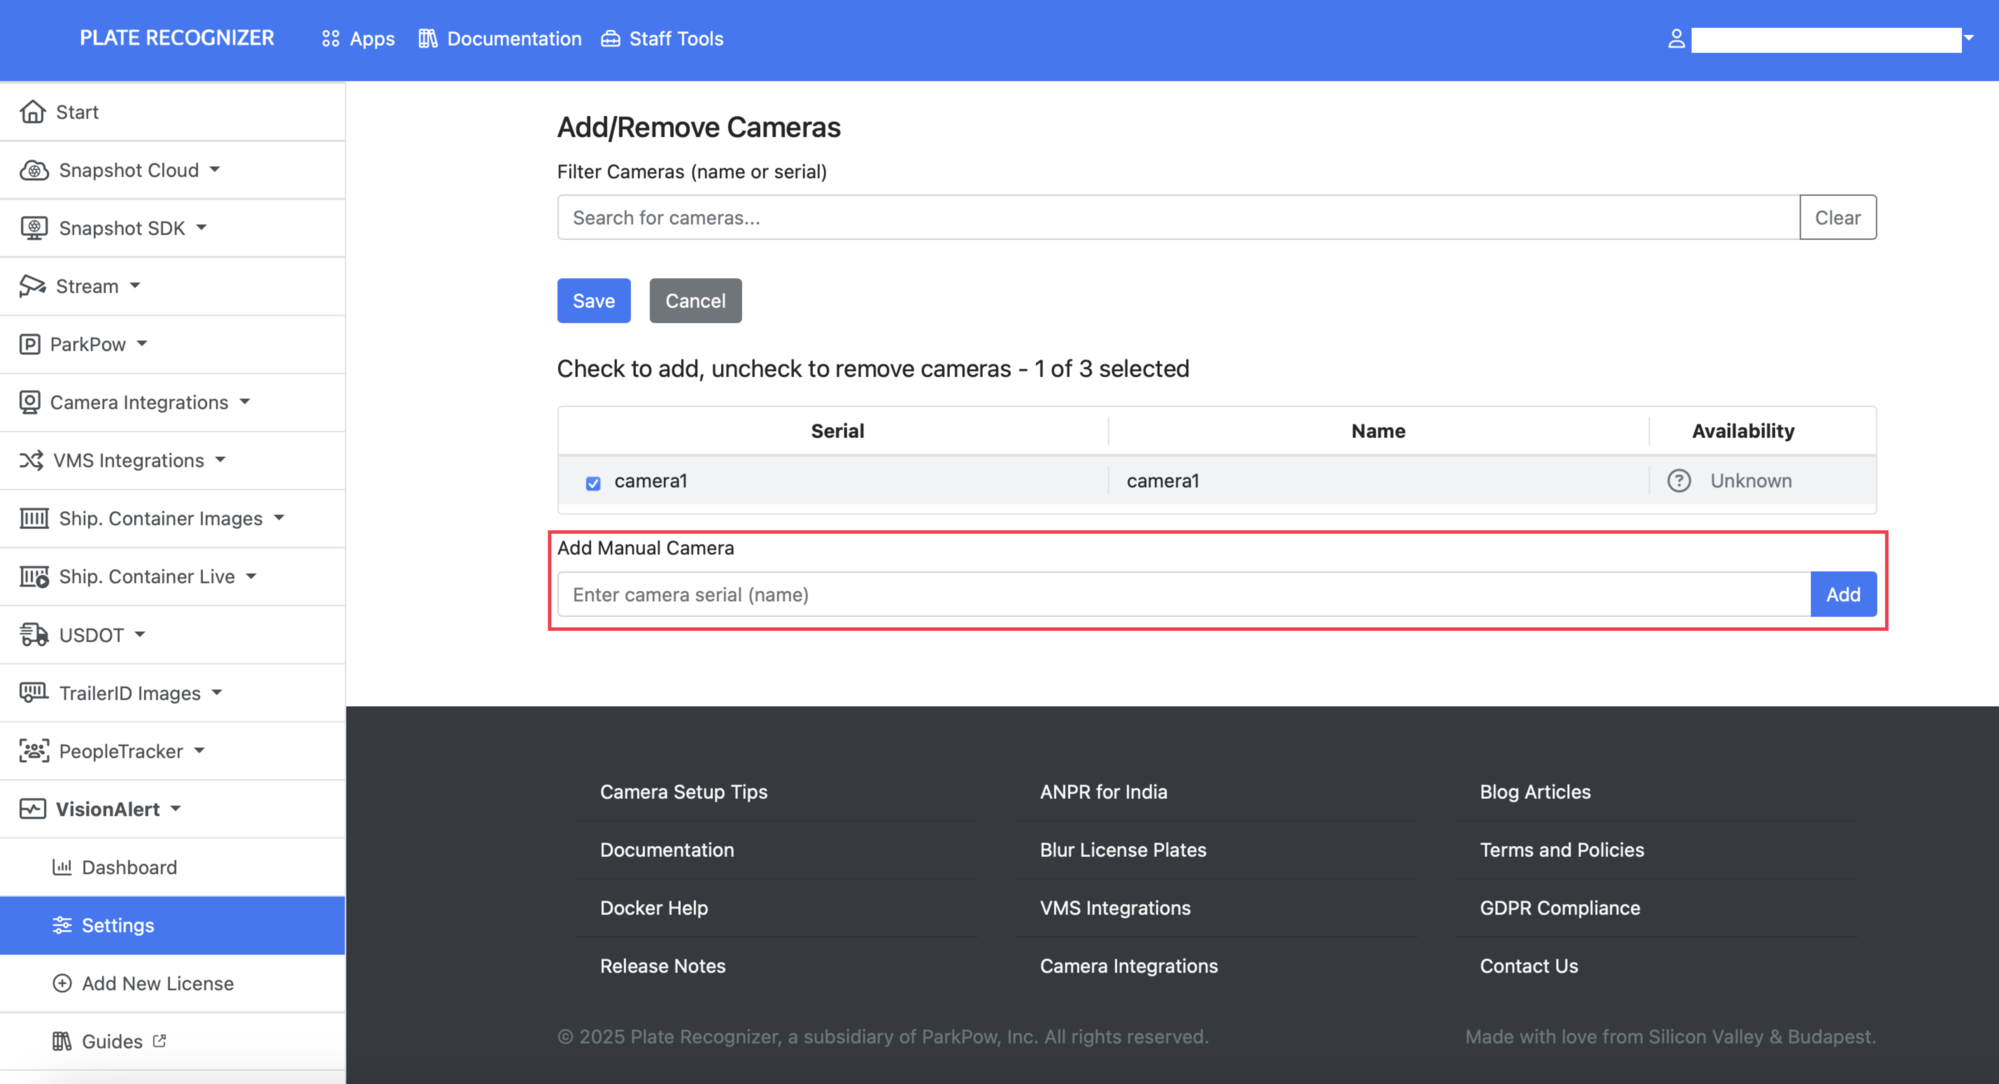
- On the license configuration page, click on the Add and Remove Cameras.
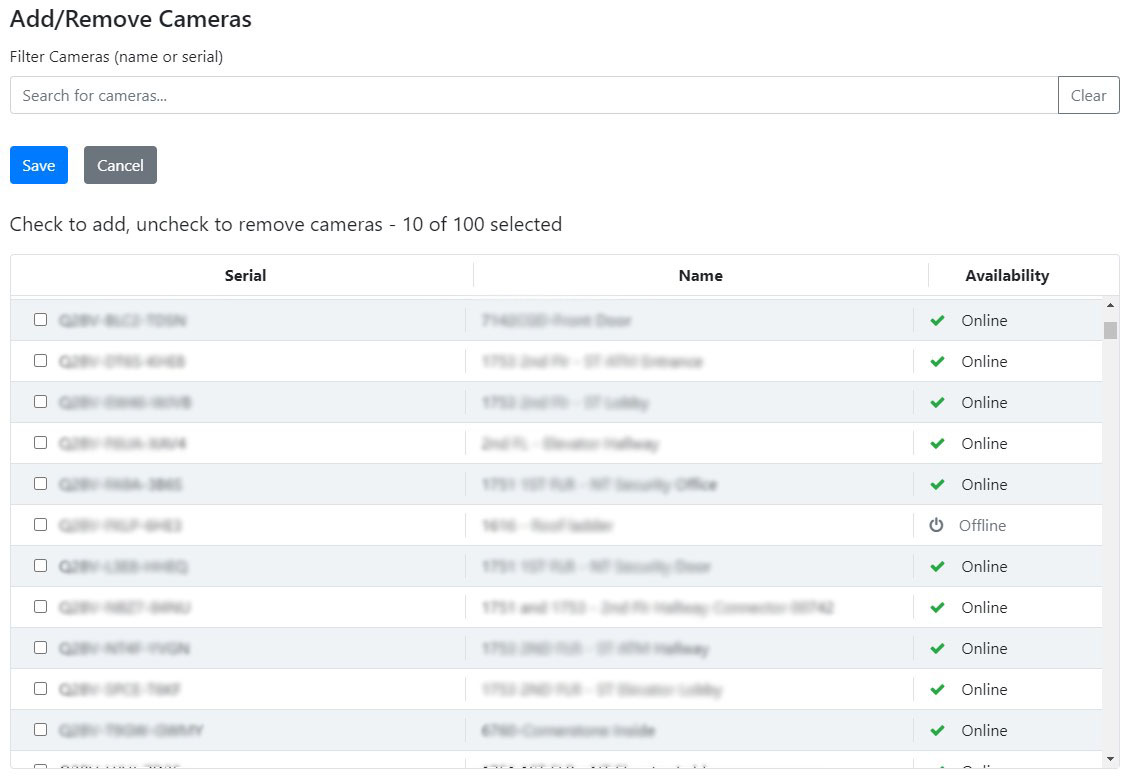
- On the Add/Remove Cameras page, you'll find a list of available cameras that you can connect to VisionAlert. This list includes each camera's serial number, name, and availability status.
For users with an FTP license, cameras can be added manually; however, cameras will also be automatically created when the first image is uploaded to the camera’s correct path.
-
Simply check the boxes next to the cameras you wish to add, and then click Save.
-
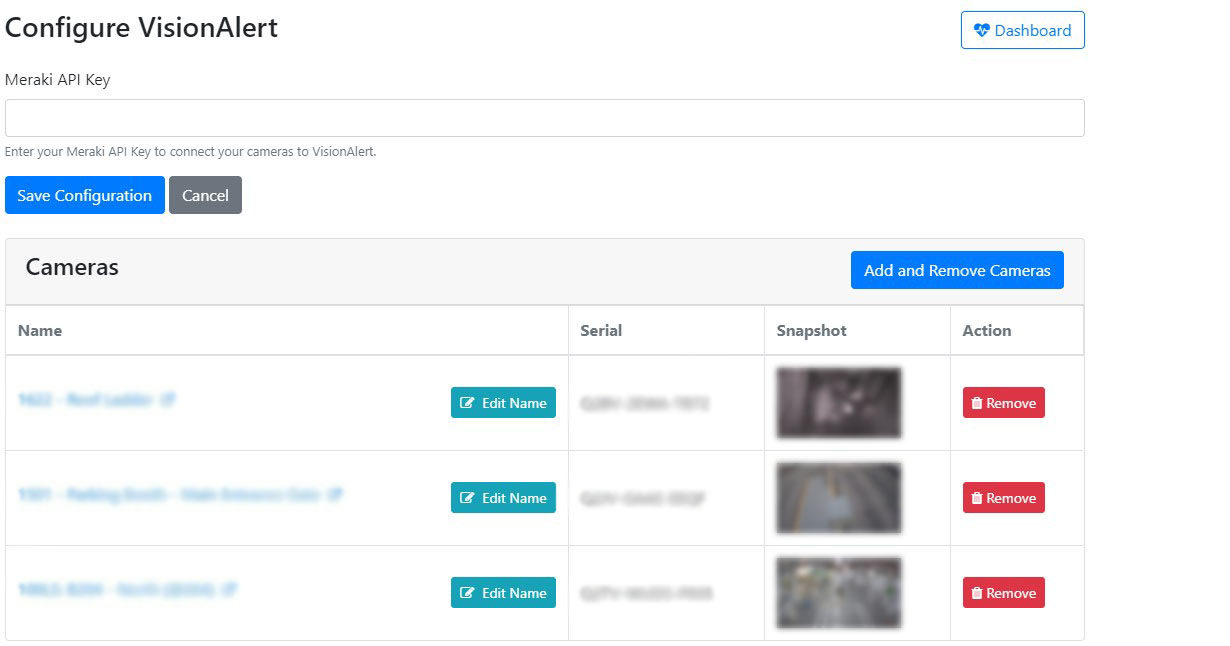
Once the first snapshot has been retrieved, the cameras you added will appear on the configuration page.
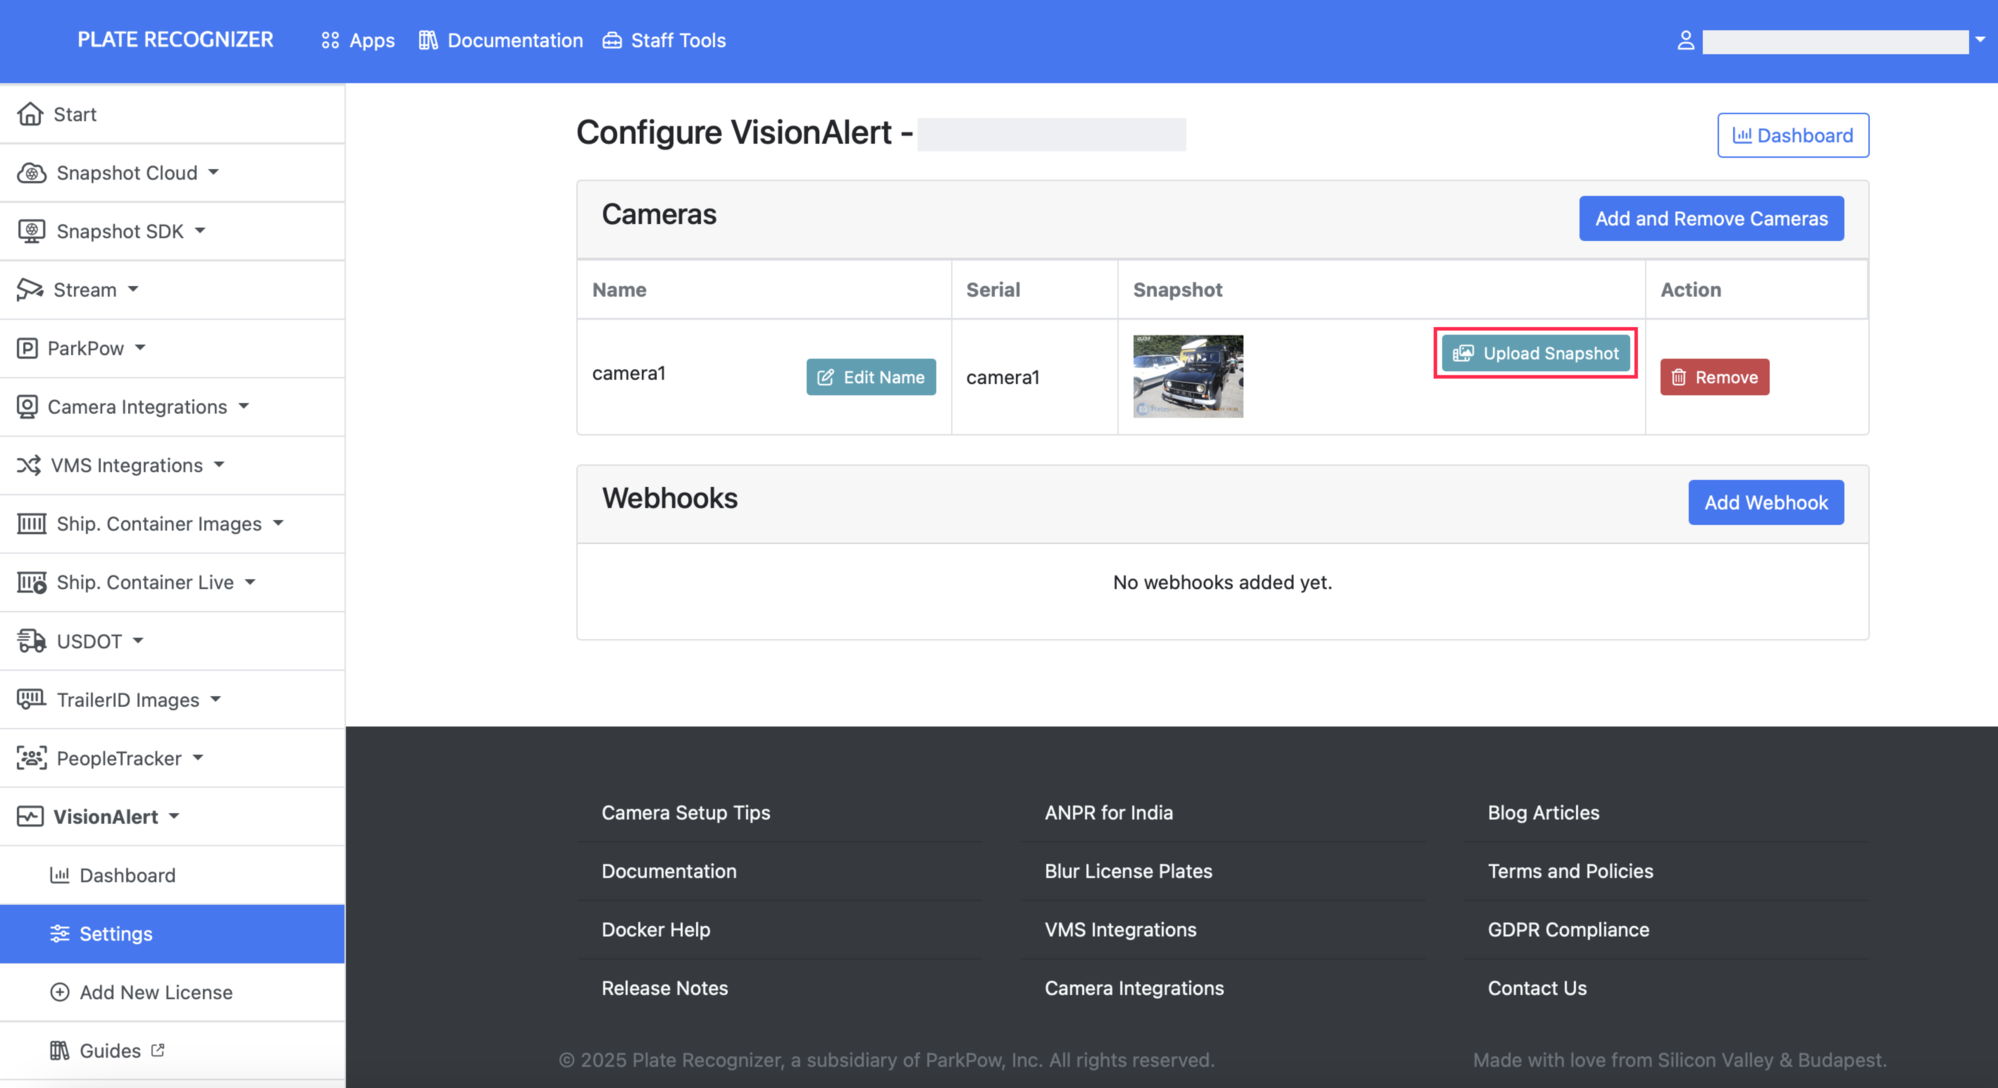
For users with an FTP license, the reference image can be uploaded manually using the “Upload Snapshot” button on the camera row; however, it will also be automatically uploaded when the first image is received in the camera’s correct path.
Tags
You can assign one or more tags to each camera. Tags are included in both webhook payloads and email notifications and are intended for client-side organization and identification purposes only.
Create / Remove Tags
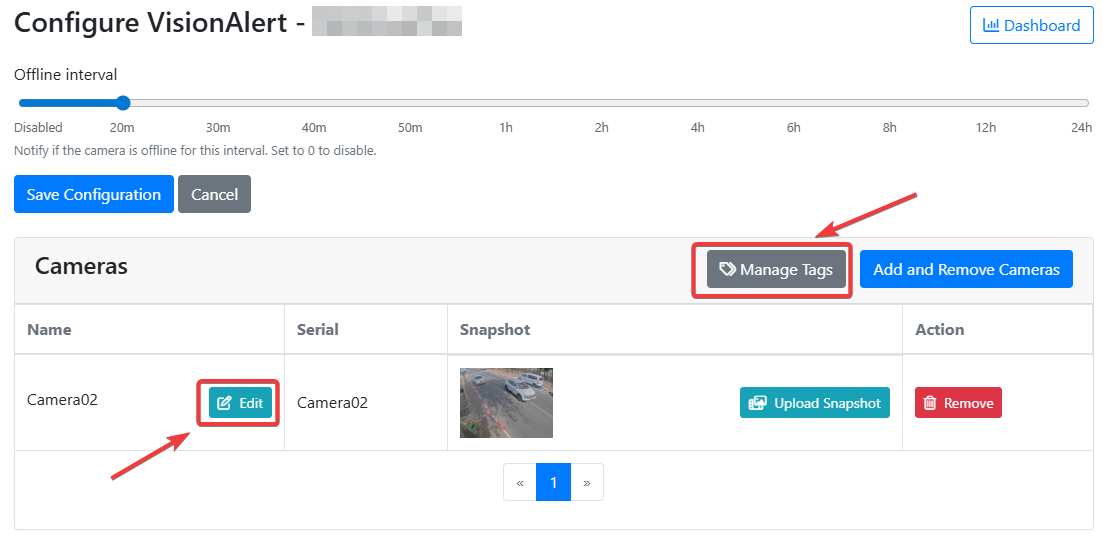
To add or remove tags from a camera, go to the Vision Alert license settings page and click the “Manage Tags” button. On this page, you can easily add or remove tags as needed in a clear and intuitive way.
Link a Camera to Tags
Return to the license settings page and open the camera edit panel by clicking the Edit button next to the camera name, as shown in the image above.
On the next page, all available tags will be listed, along with any tags that are already linked to the camera. You can add or remove tags as needed and then click Save to apply the changes.
For users with an FTP license, tag creation and assignment can be performed directly through the folder creation path. See the FTP configuration guide for more details.
Dashboard
-
To access the dashboard, click the Dashboard button on the configuration page.
-
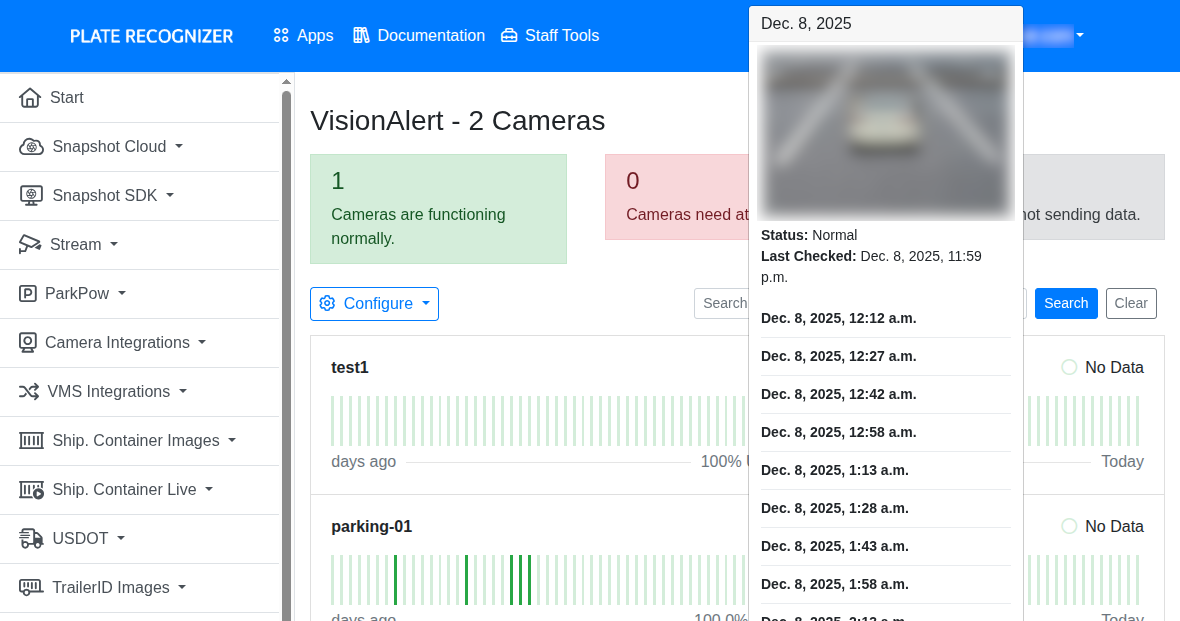
On the dashboard, you will see an overview of all configured cameras, including their current status, uptime history, and whether they are operating normally, need attention, or are not sending data.
You can search for and filter cameras by tags to quickly locate specific cameras and better organize your view.
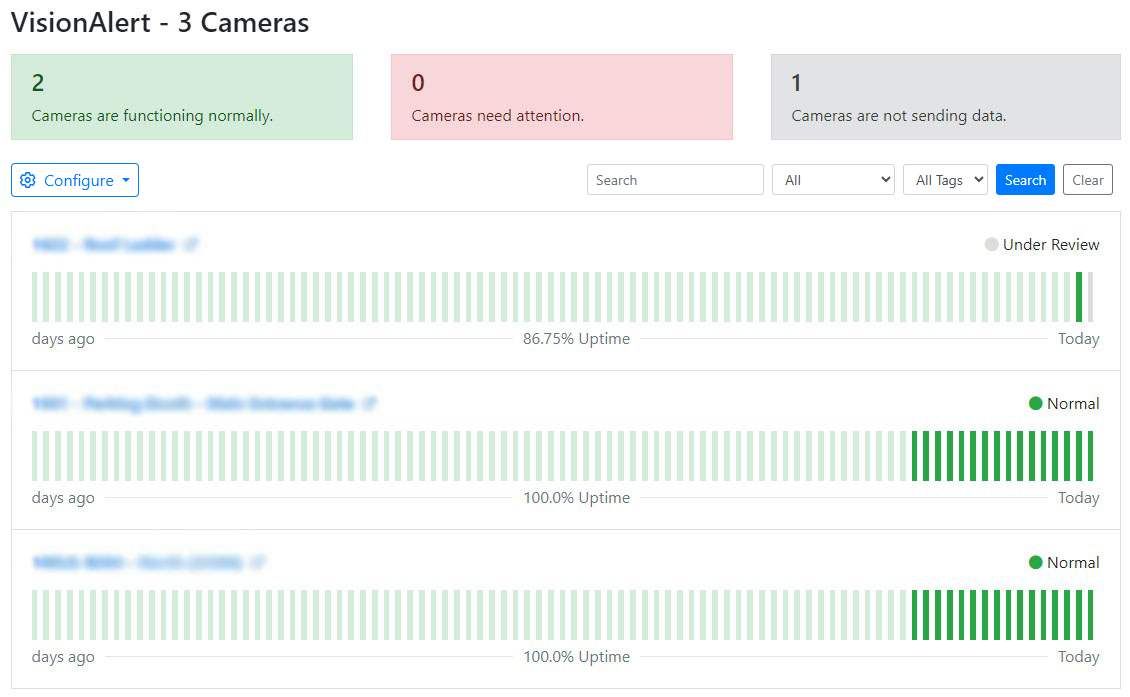
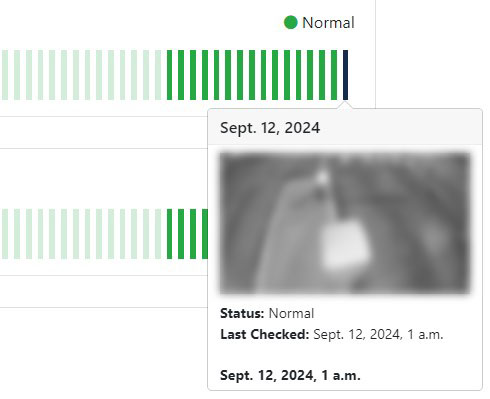
- You can also view the most recent snapshot from each camera by hovering on the status indicator.
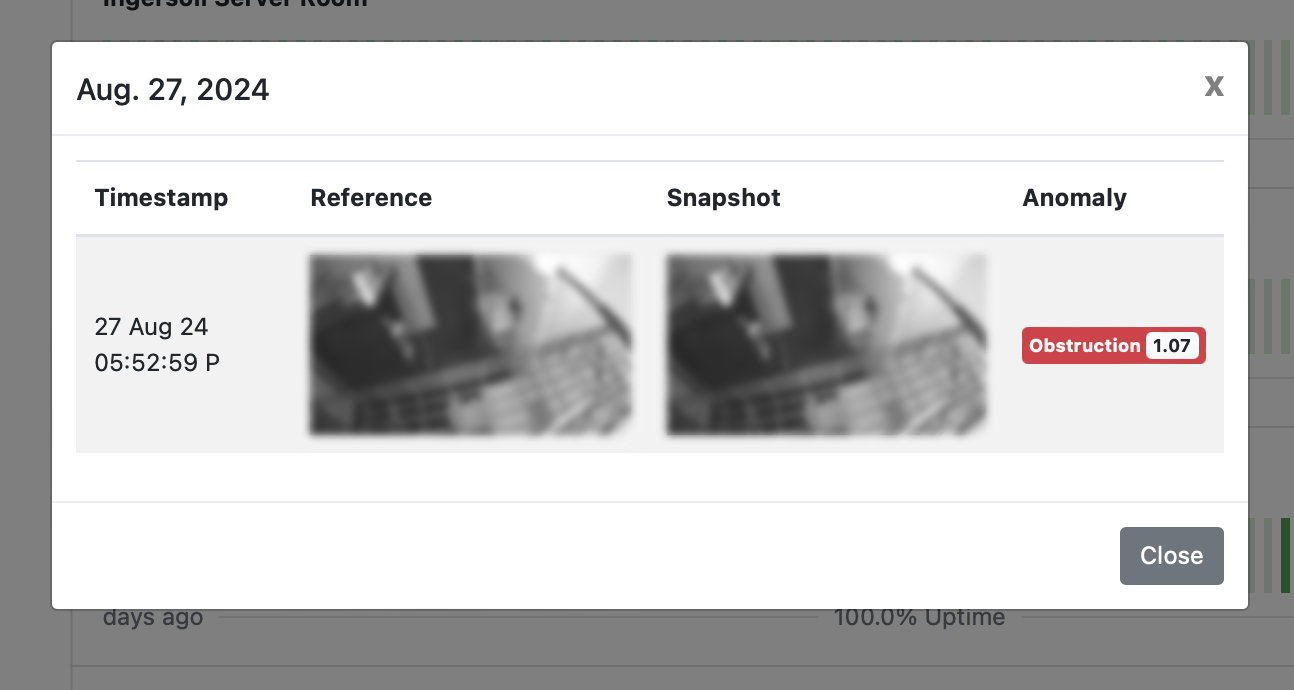
- If anomalies are detected in the camera feed, simply click on the status indicator for more information about the identified anomaly.
Choose reference image
You can set a reference image for each camera using images sent to VisionAlert. These reference images are used by the AI to compare current camera snapshots with an ideal view, helping the system accurately detect anomalies.
-
To choose a reference image, from the dashboard page, hover over a green bar. Then, the detections tooltip shows, click in its title, which is the date when that bar was captured.
-
You will see a dialog, with every snapshot captured on that date. Select the one you want to set as reference image, and click the Set as Reference button.
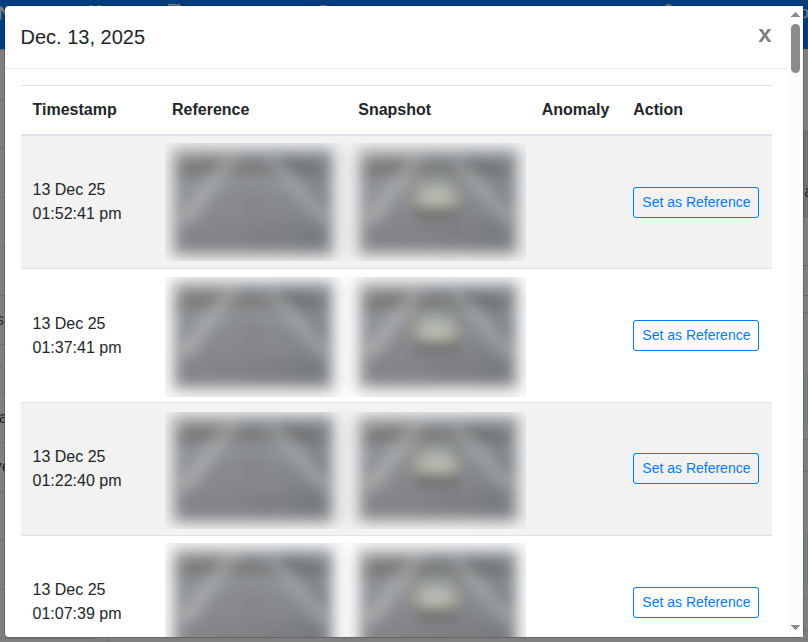
From then, in the settings, the reference image will be updated.